Skip to content

Installing Leadbehavior via Google Tag Manager Template

This guide walks you through adding the Leadbehavior template to your Google Tag Manager container and configuring it to score your leads.

Prerequisites

Before you begin, make sure you have:


Step 1: Add the Template to Your Container

  1. Open Google Tag Manager and select your container

  2. Navigate to Templates

    • In the left sidebar, click Templates
  3. Search the Community Template Gallery
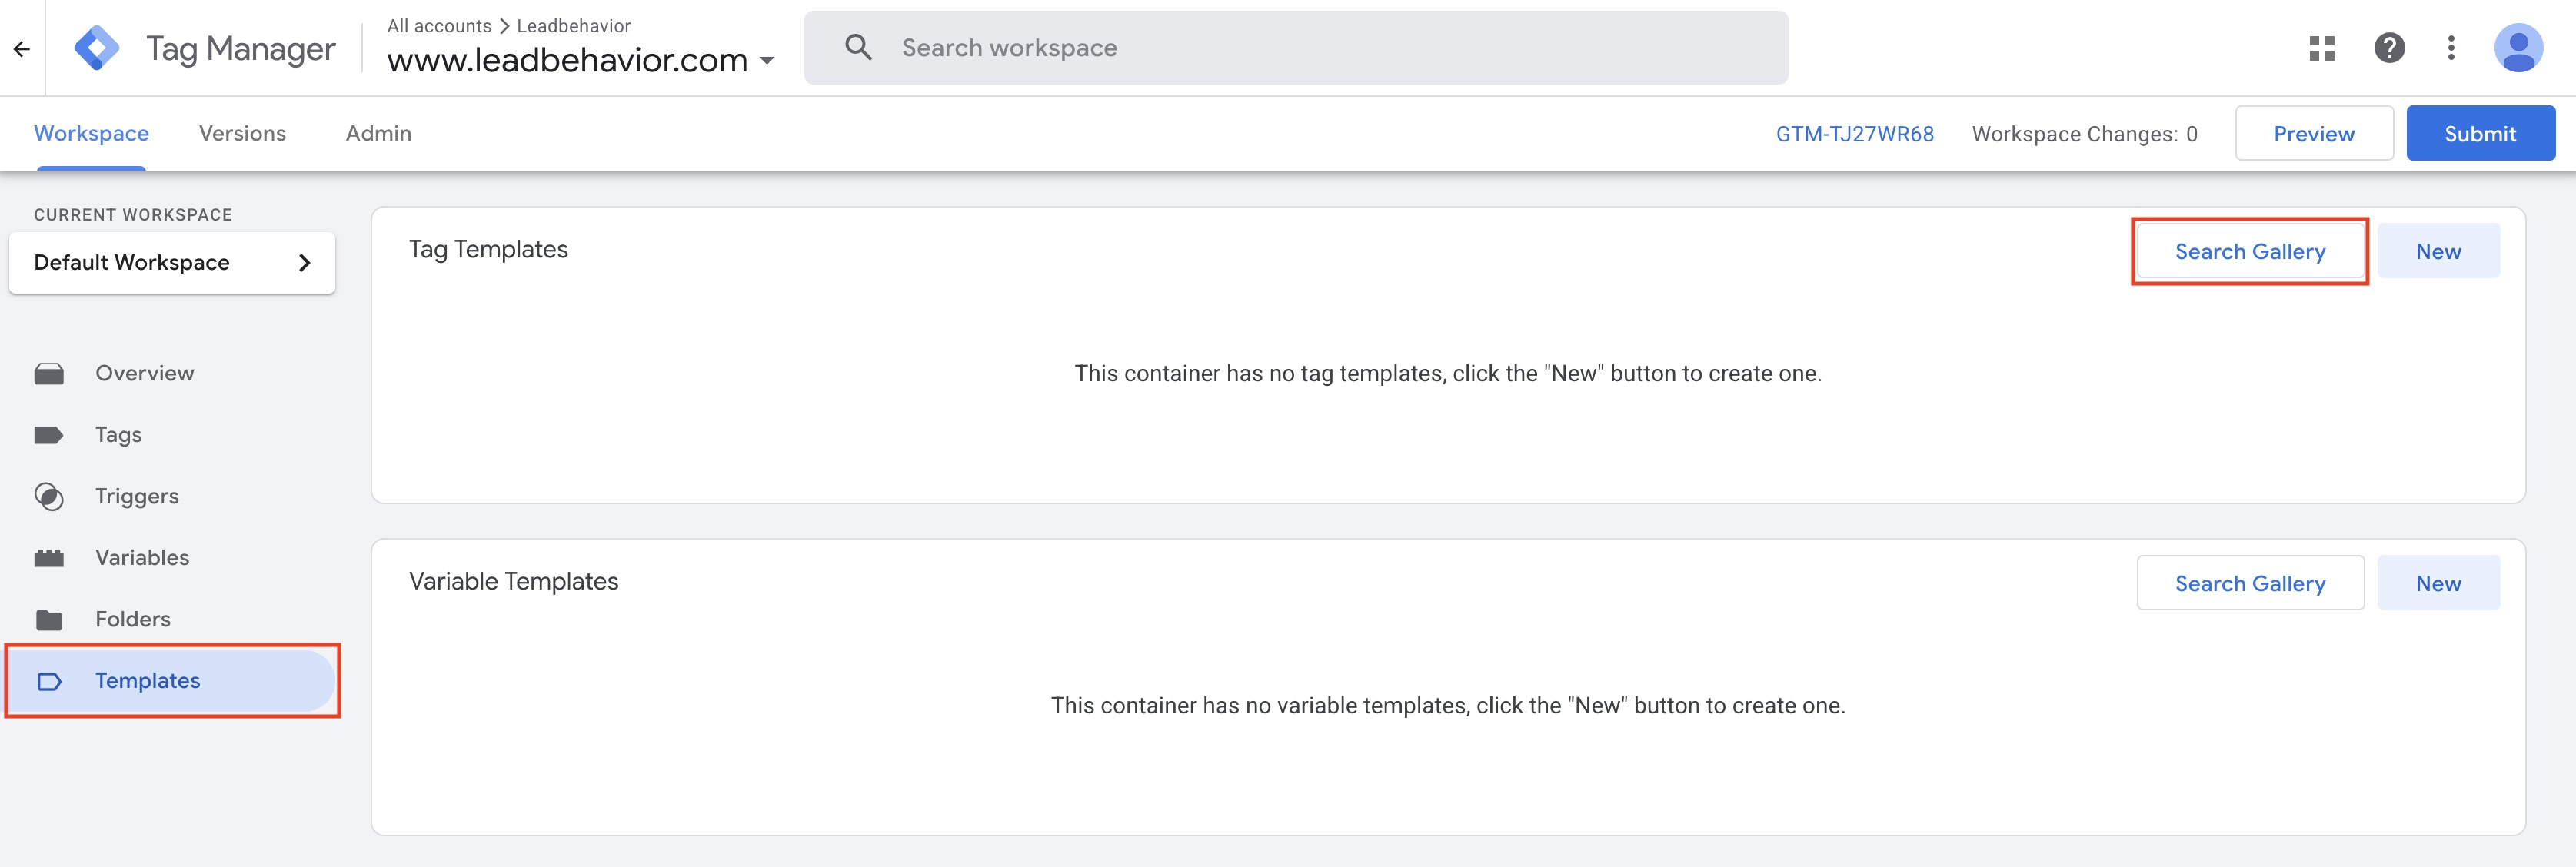
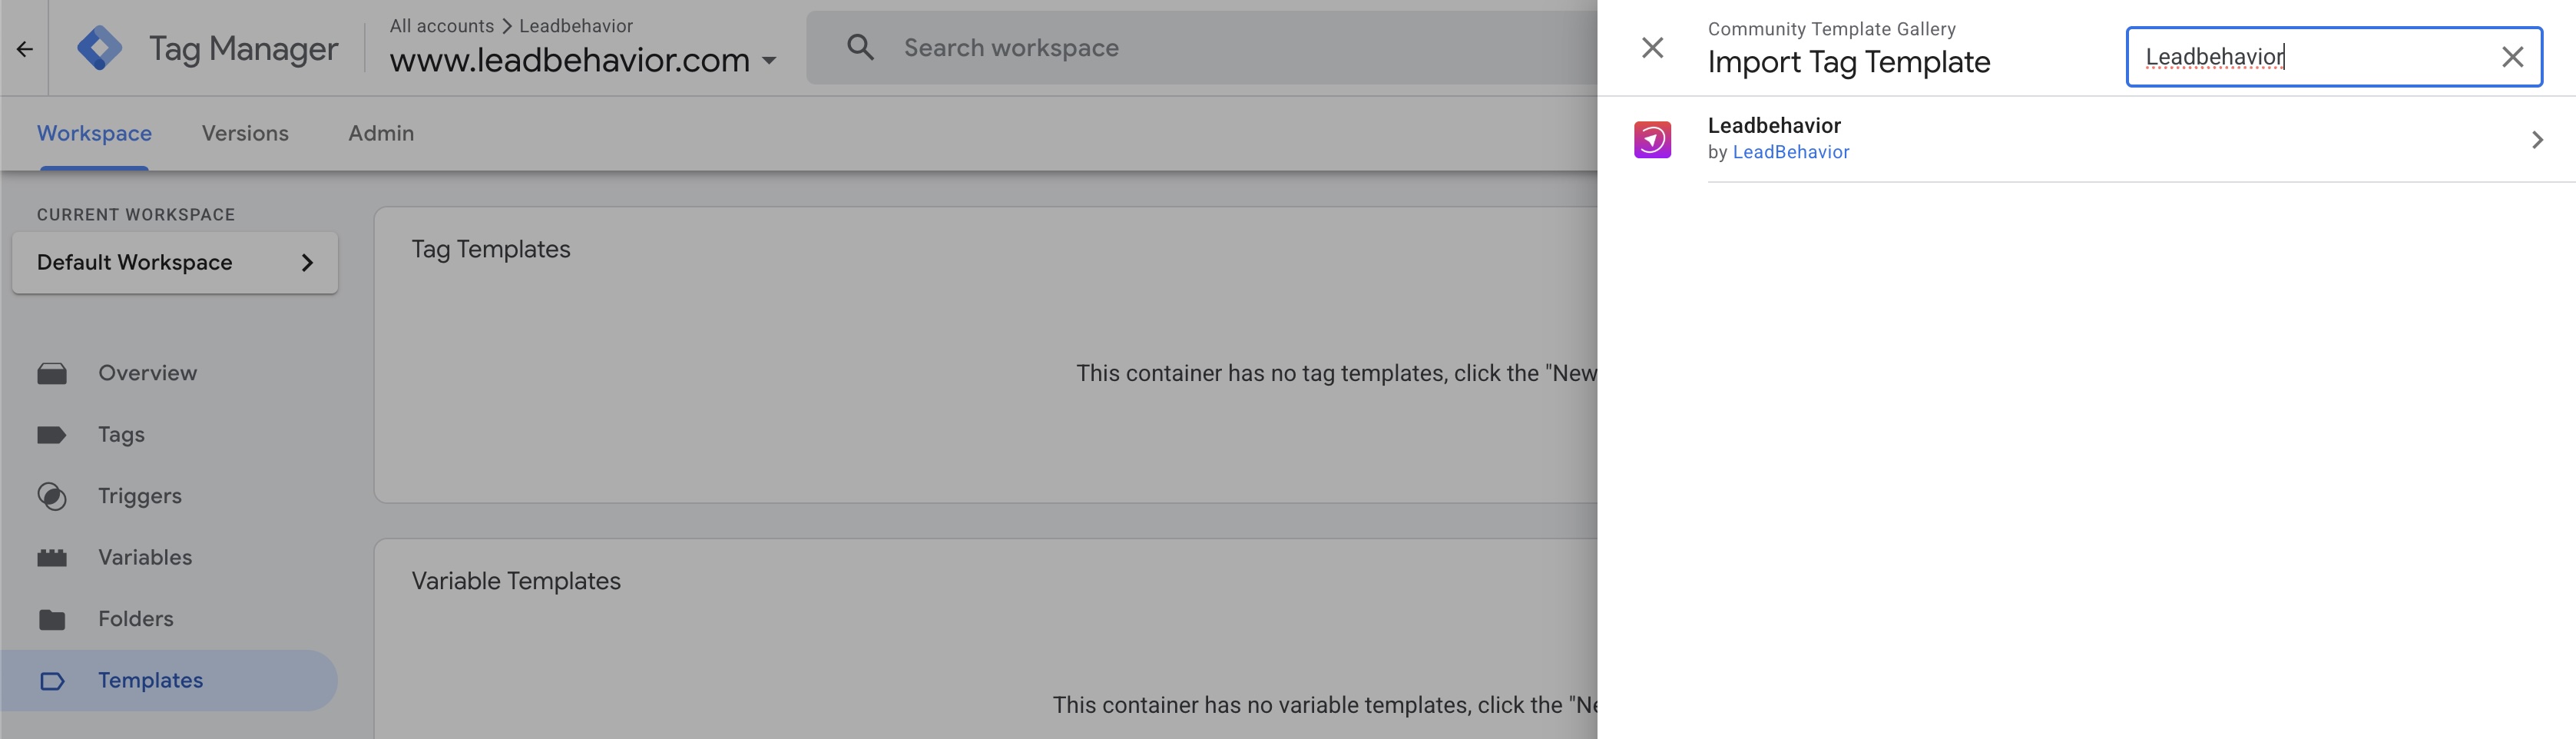
    • In the "Tag Templates" section, click Search GalleryLeadbehavior HubSpot Installation
    • Search for "Leadbehavior" Leadbehavior HubSpot Installation
    • Or use the direct link: Leadbehavior GTM Template
  4. Add the Template

    • Click on the Leadbehavior template
    • Click Add to workspace
    • Confirm by clicking Add

Step 2: Create a New Tag Using the Template

  1. Go to Tags

    • In the left sidebar, click Tags
    • Click New to create a new tag
  2. Select the Leadbehavior Template

    • Click on Tag Configuration
    • Under "Custom" templates, select Leadbehavior
  3. Configure the Tag

    Fill in the required fields:

    FieldDescriptionWhere to Find It
    Account IDYour unique Leadbehavior account identifierLeads Dashboard
    Lead IDThe ID of the lead you're scoringLeads Dashboard
    Order IDA unique identifier for each submissionGoogle Ads requires an Order ID to match on. We understand that many conversion actions on a site do not warrant an Order ID. However, since one is required for Google Ads we must generate on and send it to both the Google Ads Conversion and Leadbehavior tags.

    Order ID

    The Order ID should be a unique value for each form submission. The Google Tag Manager variable, Random Number is not sufficient because the random number is evaluated every time it is used. Consider using a cookie or local storage value that persists for the user's session.


Step 3: Set Up a Trigger

  1. Click on Triggering

    • Below the tag configuration, click Triggering
  2. Choose When to Fire

    Common trigger options:

    • Form Submission – Fire when a specific form is submitted
    • Page View – Fire on specific thank-you or confirmation pages
    • Custom Event – Fire on a custom dataLayer event

    Important

    Make sure the trigger fires after the lead data is available in your dataLayer or form variables.


Step 4: Test and Publish

Preview Mode

  1. Click Preview in the top right corner of GTM
  2. Enter your website URL
  3. Navigate to a page where the tag should fire
  4. Verify the tag fires correctly in the Tag Assistant panel
  5. Check for success/failure messages in the console

Publish

Once you've verified everything works correctly:

  1. Click Submit in the top right
  2. Add a version name (e.g., "Added Leadbehavior integration")
  3. Click Publish

Troubleshooting

Tag Not Firing

  • Verify your trigger conditions are met
  • Check that the trigger is attached to the tag
  • Use Preview mode to debug

Score Not Returning

  • Verify your Account ID is correct
  • Check that the Lead ID exists in your Leadbehavior account
  • Review console logs for error messages